Memory Acquisition on Synology NAS
As I stated in the post about Synology in VirtualBox, I wondered about forensic analysis of Synology NAS, especially about memory acquisition. As a part of preparation phase, I had to figure out how to create a Synology VM, because I did not have access to real Synology HW. Then I found the way how to create a memory dump in DSM 6.1.7 (from May 2018), but I wanted to verify my approach also in real HW with up-to-date version of DSM.
Then, I bought a refurbished Synology with support for current version of DSM 6.2.3 (from May 2020) and now I can confirm that it works.
Enable SSH service
First of all, please ensure that all of your admin accounts on Synology have strong passwords. Then we need to access to the terminal. In order to do this, we have to enable Terminal service via SSH.
Note: it is also possible to use Telnet, but from the security point of is highly discouraged to do this, because Telnet connections are not encrypted, thus your password will be transfered in plaintext)
We can use the official guide from Synology, or just follow this one with screenshots.
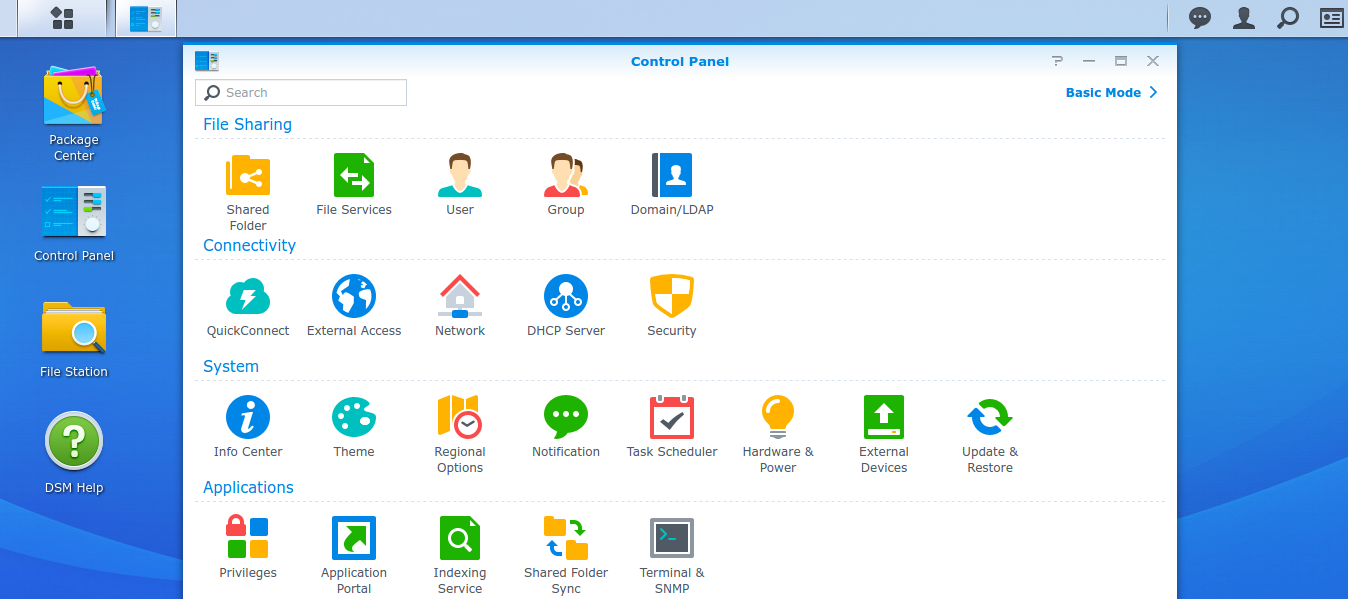
Open the Control Panel, and change it to the Advanced mode if it is still in Basic Mode via link on top right.
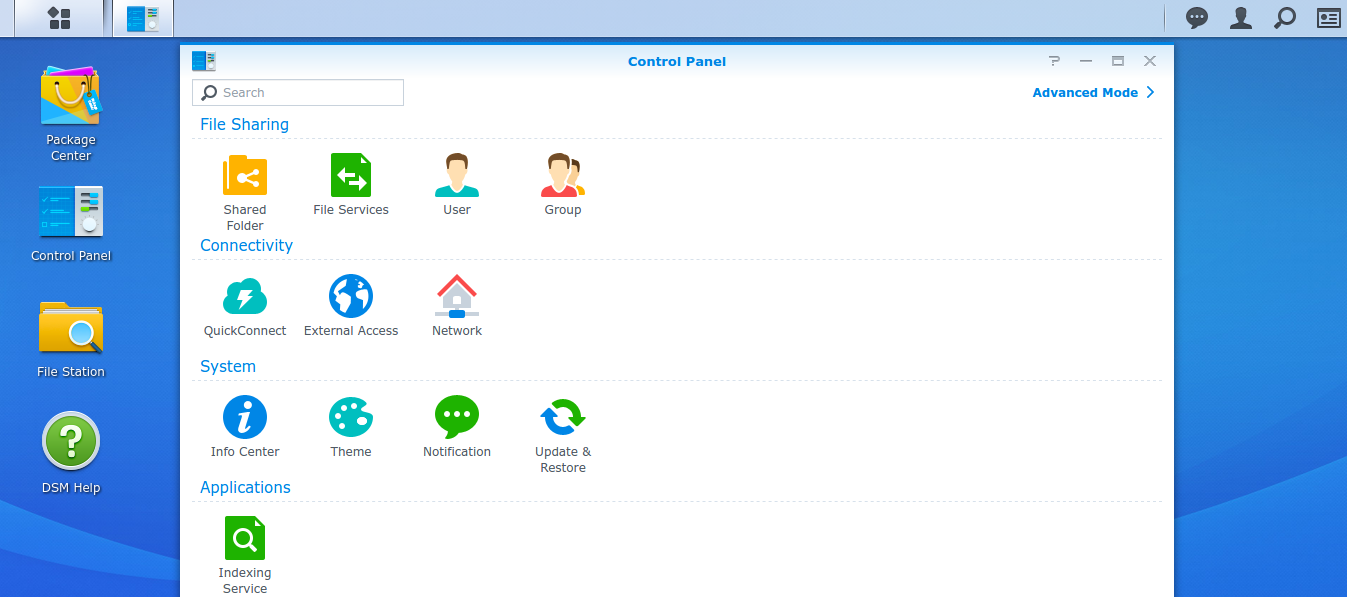
In Advanced mode, open the Terminal & SNMP in the Applications section.
Check Enable SSH service entry. You can leave port number 22 and click on Apply. Please note that if you have enabled Security Advisor, it complains about this setting, but IMHO if you later configure the authentication by public keys instead of the passwords, it is much secure and bruteforce-resistant than only the password auth on non-default port.

Also note, that only the users belonging to the administrators group can login via SSH.
Login via SSH
Now you can login to your admin account via SSH with the application PuTTy on Windows or standard terminal with the command ssh on Linux. Use the IP address (or domain name) of your Synology and, optionally, the port number:

Probably you will see error about chdir to home directory; it is because the home directory for users are not created by default. If you wish, you can create these home dirs on your own and get rid of the error message (and then you can also place your pubkey here and enable the “PubkeyAuthentication” and disable the “PasswordAuthentication” in the /etc/ssh/sshd_config file).
Elevate your privileges to root
Because dumping the content of the memory is very sensitive operation, it requires more privileges than common admin account has. We need to elevate our privileges to root level. You can use command sudo -i and enter your password.

Now we have the root shell.
Memory acquisition
On Synology, unlike on the other current Linuxes, the memory is still accessible via special device /dev/mem. Thus we can dump its content via dd command. As a output file (of= parameter) we can choose destination in the previously created shared folder (see my previous post about Synology). Note the first use of command free for determining the size of available RAM.
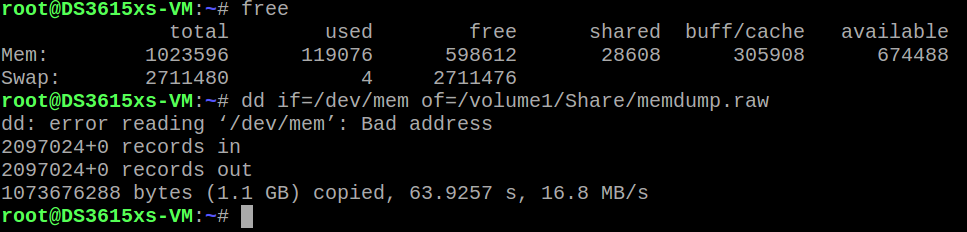
The dd command ended on with error, but when we examine the reason, we will find out, that this error occured when the dd tried to read from the address 0x3fff0000 (1073676288 in decimal) on which is mapped the ACPI table on Synology Virtual Machine.
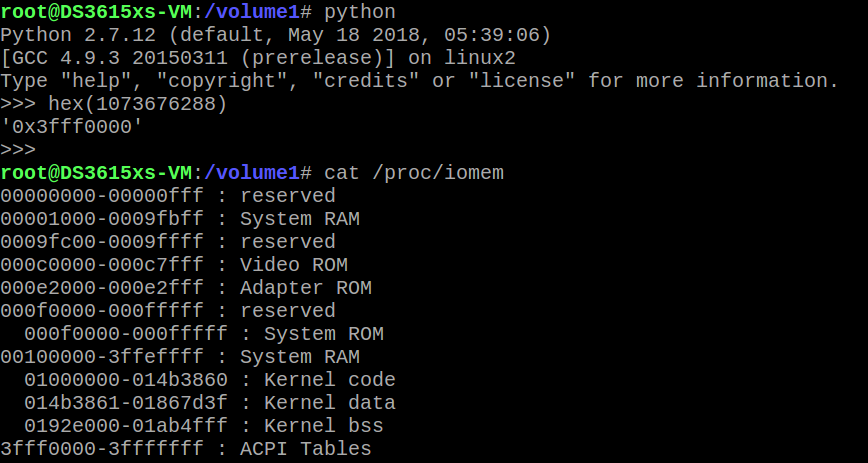
Thus, we captured content of the physical memory (except the ACPI Tables), but for basic analysis it should be sufficient (such as strings extraction)
In past on Linux machines it was also possible to read the content of memory from /proc/kmem in ELF format, but during my tests on Synology Virtual Machine the data in this ELF file contains only zeroes and on real Synology NAS this file was not present.
Now we can logout from the root shell (by exit command or CTRL+d combo) and also from the admin shell.
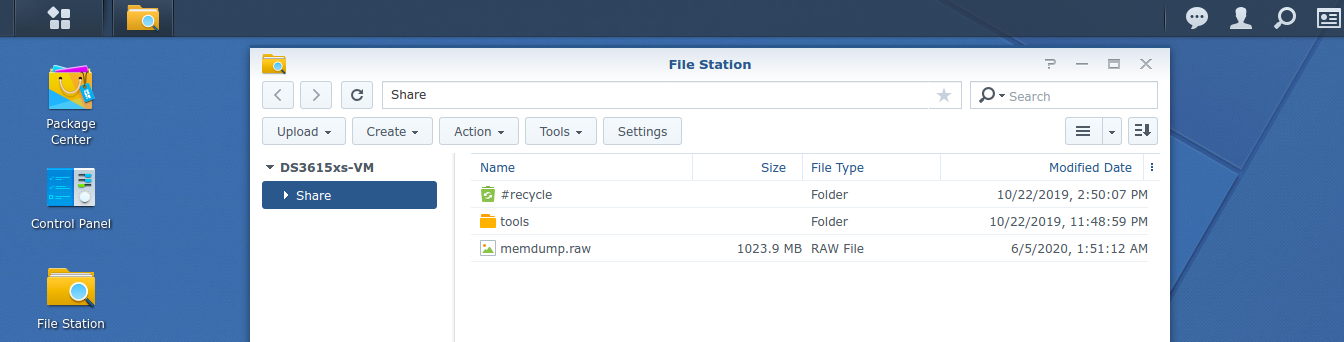
Downloading of memory dump
Just simple download the memory dump from the shared folder.
Verification
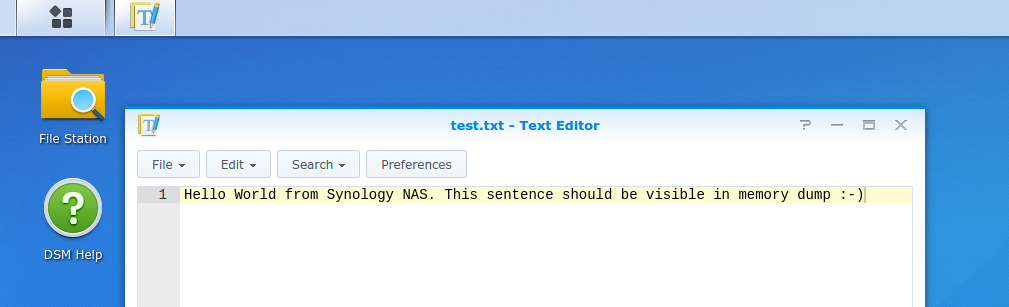
As a verification, I opened the Text Editor on real Synology NAS with DSM 6.2.3 (current version in the time of writing this post), and I wrote a sample sentence and save the file. Then, I did memory dump with the method described above and voila, my sentence is present in the memory dump.